Linux
Distros:
Scripts
Creating and running scripts if very eash, choose a directory you want the script to be saved in and create it with touch myscript.sh. Edit with your favorit text editor (ie. vim, nano). Make scripts executable with chmod +x ./myscript.sh.
Scripts need to have leading line #!/usr/bin/bash or where ever you bash install is located at. Find it with which bash.
wchesley@WalkerDesktop:~$ which bash
/bin/bash
Run shell script in the background:
- stackoverflow How to run shell script in the background
- stackexchange Difference between nohup, disown and &
Depending on what you are wanting, just add a & to the end of the command
script.sh &
command &
If you are running it in a terminal, and you want to then close the terminal, use nohup or disown
nohup
nohup script.sh &
disown
script &
disown
Difference between nohup, disown and &
Let’s first look at what happens if a program is started from an interactive shell (connected to a terminal) without & (and without any redirection). So let’s assume you’ve just typed foo:
The process running foo is created.
The process inherits stdin, stdout, and stderr from the shell. Therefore it is also connected to the same terminal.
If the shell receives a SIGHUP, it also sends a SIGHUP to the process (which normally causes the process to terminate).
Otherwise the shell waits (is blocked) until the process terminates or gets stopped.
Now, let’s look what happens if you put the process in the background, that is, type foo &:
The process running foo is created.
The process inherits stdout/stderr from the shell (so it still writes to the terminal).
The process in principle also inherits stdin, but as soon as it tries to read from stdin, it is halted.
It is put into the list of background jobs the shell manages, which means especially:
    It is listed with jobs and can be accessed using %n (where n is the job number).
    It can be turned into a foreground job using fg, in which case it continues as if you would not have used & on it (and if it was stopped due to trying to read from standard input, it now can proceed to read from the terminal).
    If the shell received a SIGHUP, it also sends a SIGHUP to the process. Depending on the shell and possibly on options set for the shell, when terminating the shell it will also send a SIGHUP to the process.
Now disown removes the job from the shell’s job list, so all the subpoints above don’t apply any more (including the process being sent a SIGHUP by the shell). However note that it still is connected to the terminal, so if the terminal is destroyed (which can happen if it was a pty, like those created by xterm or ssh, and the controlling program is terminated, by closing the xterm or terminating the SSH connection), the program will fail as soon as it tries to read from standard input or write to standard output.
What nohup does, on the other hand, is to effectively separate the process from the terminal:
It closes standard input (the program will not be able to read any input, even if it is run in the foreground. it is not halted, but will receive an error code or EOF).
It redirects standard output and standard error to the file nohup.out, so the program won't fail for writing to standard output if the terminal fails, so whatever the process writes is not lost.
It prevents the process from receiving a SIGHUP (thus the name).
Note that nohup does not remove the process from the shell’s job control and also doesn’t put it in the background (but since a foreground nohup job is more or less useless, you’d generally put it into the background using &). For example, unlike with disown, the shell will still tell you when the nohup job has completed (unless the shell is terminated before, of course).
So to summarize:
& puts the job in the background, that is, makes it block on attempting to read input, and makes the shell not wait for its completion.
disown removes the process from the shell's job control, but it still leaves it connected to the terminal. One of the results is that the shell won't send it a SIGHUP. Obviously, it can only be applied to background jobs, because you cannot enter it when a foreground job is running.
nohup disconnects the process from the terminal, redirects its output to nohup.out and shields it from SIGHUP. One of the effects (the naming one) is that the process won't receive any sent SIGHUP. It is completely independent from job control and could in principle be used also for foreground jobs (although that's not very useful).
SSH
Create SSH key:
ssh keygen -t rsa- default options on creating an RSA key, promps will ask you some qustions as outlined here:
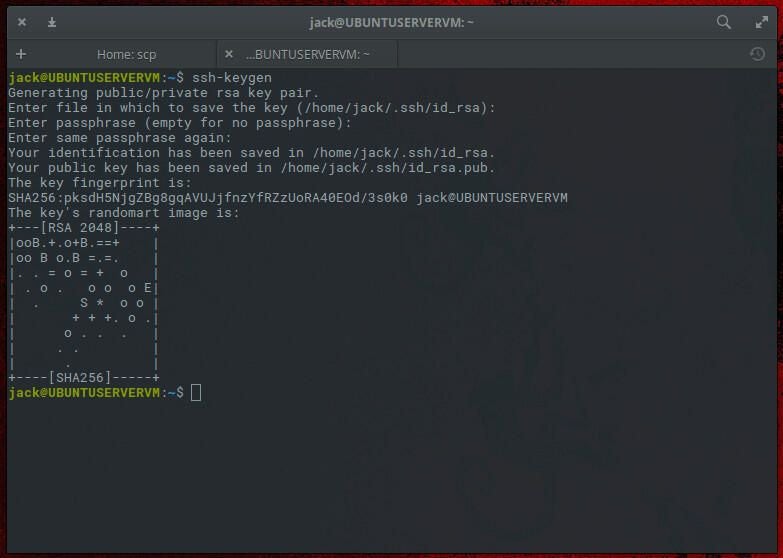
- default options on creating an RSA key, promps will ask you some qustions as outlined here:
scp with ssh key
- source: scp with ssh key (techrepublic)
Have an SSH key already generated or create one.
Then it’s simply just:
scp -i ~/.ssh/id_rsa.pub FILENAME USER@SERVER:/home/USER/FILENAME
tar useage
Created: June 27, 2021 8:50 PM
Created By: Walker Chesley
Last Edited By: Walker Chesley
Last Edited Time: May 26, 2022 4:36pm
Most common:
Create tar archive:
tar -czvf projects.tar.gz $HOME/projects/ where first is name of new archive, and second is directory to compress
Extract tar:
tar -xzvf projects.tar.gz -C /tmp/ the -C flag points this to a directory
Extract tar without creating a new directory:
tar xvf group.tar --strip-components 1
Pulled from: https://stackoverflow.com/questions/30253463/extract-tar-file-without-creating-folder on 5/26/2022
Extracting tar.gz File from stdin
If you are extracting a compressed tar.gz file by reading the archive from stdin (usually through a pipe), you need to specify the decompression option. The option that tells tar to read the archives through gzip is -z.
In the following example we are downloading the Blender sources using the wget command and pipe its output to the tar command:
wget -c https://download.blender.org/source/blender-2.80.tar.gz -O - | sudo tar -xz
If you don’t specify a decompression option, tar will indicate which option you should use:
tar: Archive is compressed. Use -z option
tar: Error is not recoverable: exiting now
Pulled from: https://linuxize.com/post/how-to-extract-unzip-tar-gz-file/ 5/26/2022
Linux Networking
Add Static routes:
Ref:
- Static Routes (linuxtechi.com)
-
Debian Wiki - Networking
View current routes with either
ip route showroute -nsudo netstat -nr
Add route to specific IP:
sudo ip route add 10.0.2.15 via 192.168.43.223 dev enp0s3
Add route to subnet:
sudo ip route add 10.0.2.0/24 via 192.168.43.223 dev enp0s3
Where:
10.0.2.0-> is the network you want to connect to/24-> is the subnet mask192.168.43.223-> is the IP through which we will reach the serverenp0s3-> is the network interface
Permenantly Add Static Route (Debian):
For Debian distributions, edit the file /etc/network/interfaces and Append the following line:
up route add -net 10.0.2.0 netmask 255.255.255.0 gw 192.168.43.1 dev enp0s3
- Note, line needs to be under interface definition ie:
# Pulled from Kali's /etc/network/interfaces, added static route to for cli access to switch
iface eth0 inet static
  address 192.168.0.16
  netmask 255.255.255.0
  gateway 192.168.0.1
  dns-nameservers 192.168.0.21 1.1.1.1
  up route add - net 10.0.0.3 netmask 255.255.255.255 gw 192.168.0.16 dev eth0
Save and Exit text editor. Apply changes by restarting network interface with ifup/down:
sudo ifdown enp0s3 && sudo ifup enp0s3
How to tell if ethernet is pluged into NIC (physical cable connection)
- Pulled from: How to detect whether a physical cable is connected to network card slot on Linux (linuxconfig.org)
The below command will list all available network interfaces on your Linux system:
for i in $( ls /sys/class/net ); do echo $i; done
eth0
eth1
lo
wlan0
Using a bash for loop we can now check whether a network cable is connected for all network interfaces at once:
for i in $( ls /sys/class/net ); do echo -n $i: ; cat /sys/class/net/$i/carrier; done
eth0:1
eth1:0
lo:1
wlan0:cat: /sys/class/net/wlan0/carrier: Invalid argument
Where a 1 shows cable connected, 0 is no cable, cat: /sys/class/net/wlan0/carrier: Invalid argument means the interface is not enabled or is powered down. Confirm powered on state with:
cat /sys/class/net/eth1/operstate
down
Turn interface on with: ip link set dev eth1 up
IP Forwarding
Created: June 29, 2021 9:44 AM
Created By: Walker Chesley
Last Edited By: Walker Chesley
Last Edited Time: June 29, 2021 9:45 AM
How to turn on IP forwarding (linuxconfig.org)
Check if IP Forwarding is enabled (1) or disabled (0)
sysctl net.ipv4.ip_forward
Enable IP Forwarding:
sysctl -w net.ipv4.ip_forward=1
Disable IP Forwarding:
sysctl -w net.ipv4.ip_forward=0